




How To Put Weather Stripping on A Door?
Weather stripping is installed by cleaning the door frame, measuring each sealing edge, cutting the gasket accurately, and fixing it where the closed door can create continuous compression. A separate door-bottom seal or threshold normally closes the gap beneath the leaf.
The seal must stop air and water without preventing smooth closing or reliable latching.
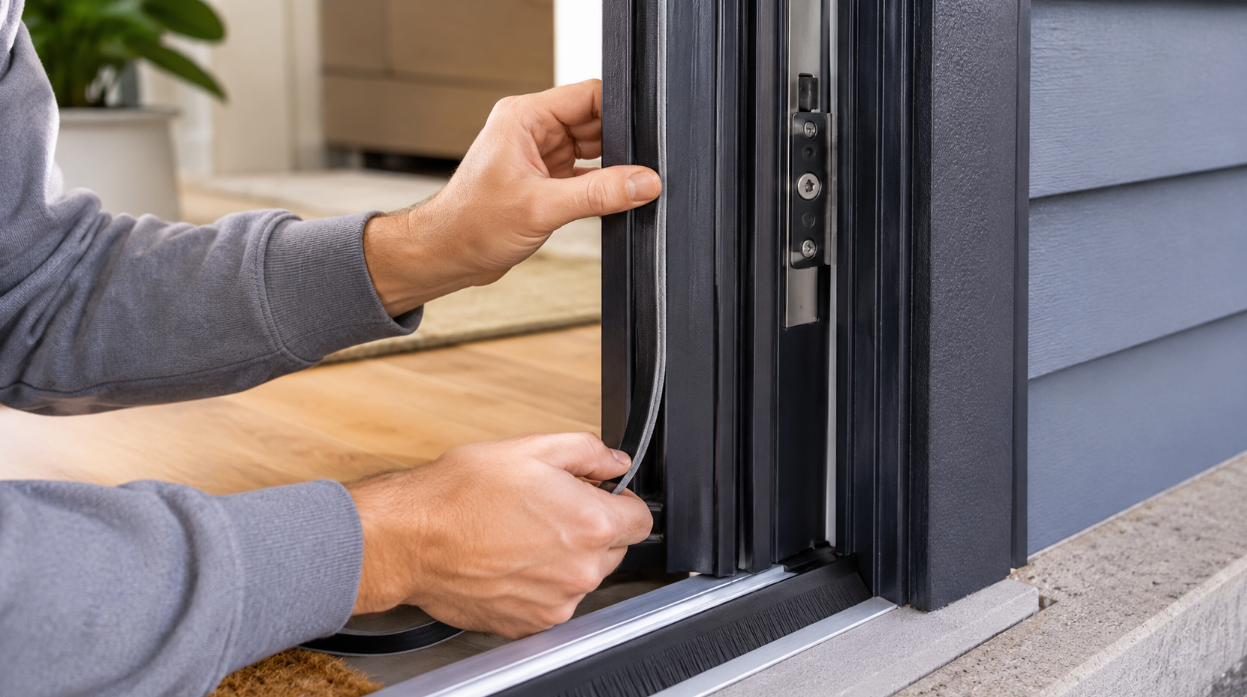
Table of Contents
- Choose the Seal for the Door Structure
- Inspect the Door Before Installation
- Clean and Prepare the Frame
- Measure the Head and Jambs Separately
- Locate the Correct Compression Line
- Seal the Bottom Gap
- Test Closing and Water Resistance
- Maintain the Weather Stripping
- Factory-Integrated Weather Sealing
- Get a Weather-Resistant Entrance Door Quote
Choose the Seal for the Door Structure
Weather stripping is not one universal tape.
Common options include:
Adhesive foam tape
Easy to install and suitable for light-duty gaps. It may compress permanently under frequent use.
EPDM or silicone compression seal
Provides controlled rebound and is suitable for many exterior doors.
Kerf-in gasket
Pushes into a prepared groove in the frame and can be replaced without adhesive.
Magnetic seal
Creates continuous contact on compatible metal structures.
Brush seal
Reduces dust and airflow across uneven gaps but is less airtight than compression sealing.
Automatic drop seal
Lowers at the door bottom when the leaf closes.
Select the profile according to the gap size. A seal that is too thin will not make contact, while one that is too thick can stop the door from latching.
Inspect the Door Before Installation
Weather stripping should not be used to hide a major alignment problem.
Check:
Door gaps
Hinge tightness
Frame square
Threshold height
Latch alignment
Existing seal grooves
Water staining
Surface condition
Door-bottom clearance
Repair loose hinges and damaged frame areas first.
When the door rubs against the jamb, adding another gasket will make operation worse.
Remove the old weather stripping completely. Adhesive residue and broken foam prevent the new seal from sitting evenly.
Clean and Prepare the Frame
Use a cleaner compatible with the frame finish.
Remove dust, grease, old adhesive, loose paint, and moisture. Allow the surface to dry fully.
For adhesive-backed products, installation temperature affects bonding. Apply the seal within the range stated by its manufacturer.
Do not attach tape over:
Wet surfaces
Flaking paint
Heavy corrosion
Uncured sealant
Loose powder coating
Construction dust
Test the adhesive on a concealed area when the door has a special painted, wood-grain, anodized, or PVD-style finish.
Measure the Head and Jambs Separately
Measure the top of the frame and both vertical sides.
Cut each piece slightly long for test fitting, then trim it accurately.
The corners should meet without overlapping into a thick lump. Open corner joints create leakage paths, but heavy overlaps can push the door away from the frame.
For an adhesive strip:
Peel back only a short section of the liner.
Align the seal with the contact area.
Press it gradually along the jamb.
Avoid stretching the material.
Apply firm, even pressure.
Trim the final end cleanly.
Stretched rubber can shrink later and leave gaps at the corners.
Locate the Correct Compression Line
The gasket should contact a flat, continuous section of the door leaf.
Close the door gently before removing the full adhesive liner. Confirm that the chosen position creates contact around the complete perimeter.
Use a removable paper test if necessary. Place paper between the leaf and frame, close the door, and pull gently.
The resistance should be reasonably consistent around the opening.
Very loose sections indicate insufficient compression. Sections where the paper cannot move at all may be excessively tight.
Seal the Bottom Gap
The bottom requires a product matched to the threshold and floor.
Possible options include:
Flexible door sweep
Brush sweep
Automatic drop seal
U-shaped door-bottom gasket
Adjustable threshold
Compression sill seal
Measure the door width and mark any required fixing holes accurately.
A surface-mounted sweep should contact the threshold or floor lightly without folding beneath the door.
Exterior entrance doors need drainage planning. A seal should not trap rainwater against the door or block intended drainage channels.
For an inward-opening door, the threshold and exterior rain path must work together. For an outward-opening door, hinge protection and perimeter sealing require a different frame relationship.
Test Closing and Water Resistance
After installation, operate the door repeatedly.
Check that:
The latch engages without force
The handle returns normally
The door closer completes its cycle
The gasket remains in position
Corners stay closed
The bottom seal does not drag excessively
The threshold remains stable
No seal enters the lock opening
Use a controlled water test only when suitable for the installation. Do not direct high-pressure water at the entrance and treat the result as a standard performance test.
Professional air- and water-infiltration testing requires defined pressure and test conditions.
Maintain the Weather Stripping
Clean the gasket with mild soap and water.
Avoid petroleum-based chemicals unless the seal manufacturer approves them.
Inspect the weather stripping when:
The door becomes harder to close
Drafts return
Light appears around the frame
The seal cracks
Corners pull apart
The bottom sweep tears
Water marks appear indoors
The door is realigned
Replace damaged sections with the same profile where possible. Mixing several seal thicknesses can create uneven compression.
Factory-Integrated Weather Sealing
Our factory manufactures aluminum, stainless steel, steel, armored, pivot, and cast-aluminum entrance doors with customized frame and sealing structures.
As a weather sealed aluminum front door OEM manufacturer, we can design the gasket groove, door-leaf overlap, threshold, frame depth, opening direction, lock position, and hardware preparation as one coordinated system.
OEM/ODM options include:
Aluminum-system door frames
Automotive-grade sealing-strip directions
Compression-seal channels
Adjustable threshold structures
Inward or outward opening
Single or double entrance doors
Decorative panel customization
Metallic, matte, and wood-grain finishes
Smart-lock preparation
Installation and packing references
Integrated laser, CNC, automated-forming, and ERP-managed production supports more repeatable seal contact and hardware positioning across project quantities.
Get a Weather-Resistant Entrance Door Quote
Send us the opening dimensions, local climate, exposure direction, threshold detail, preferred door material, hardware, finish, quantity, and target market.
Our team can develop a weather-sealed entrance solution and provide drawings, sample details, OEM/ODM configuration, production inspection, project identification, and export delivery planning.